RGB6 Quick Start Guide
Full manual: www.pogowash.com
Install the timer
Replacing a Dixmor LED 6
- Remove the old timer and unplug its Molex connector. Leave the harness in place.
- Plug the harness into the RGB6. It only fits one way.
- Mount the RGB6 with its bottom wing nut.
- Restore power. The display lights up within a few seconds.
The RGB6 doesn't use pin 1 (the LED 6 counter pulse output), so a counter wired to it will stop advancing. Pulses and revenue are logged on POGOWash.com instead.
New installation
Use the included Molex connector with 16" cable and wire each lead according to the pinout. Make splices with connectors rated for damp locations.
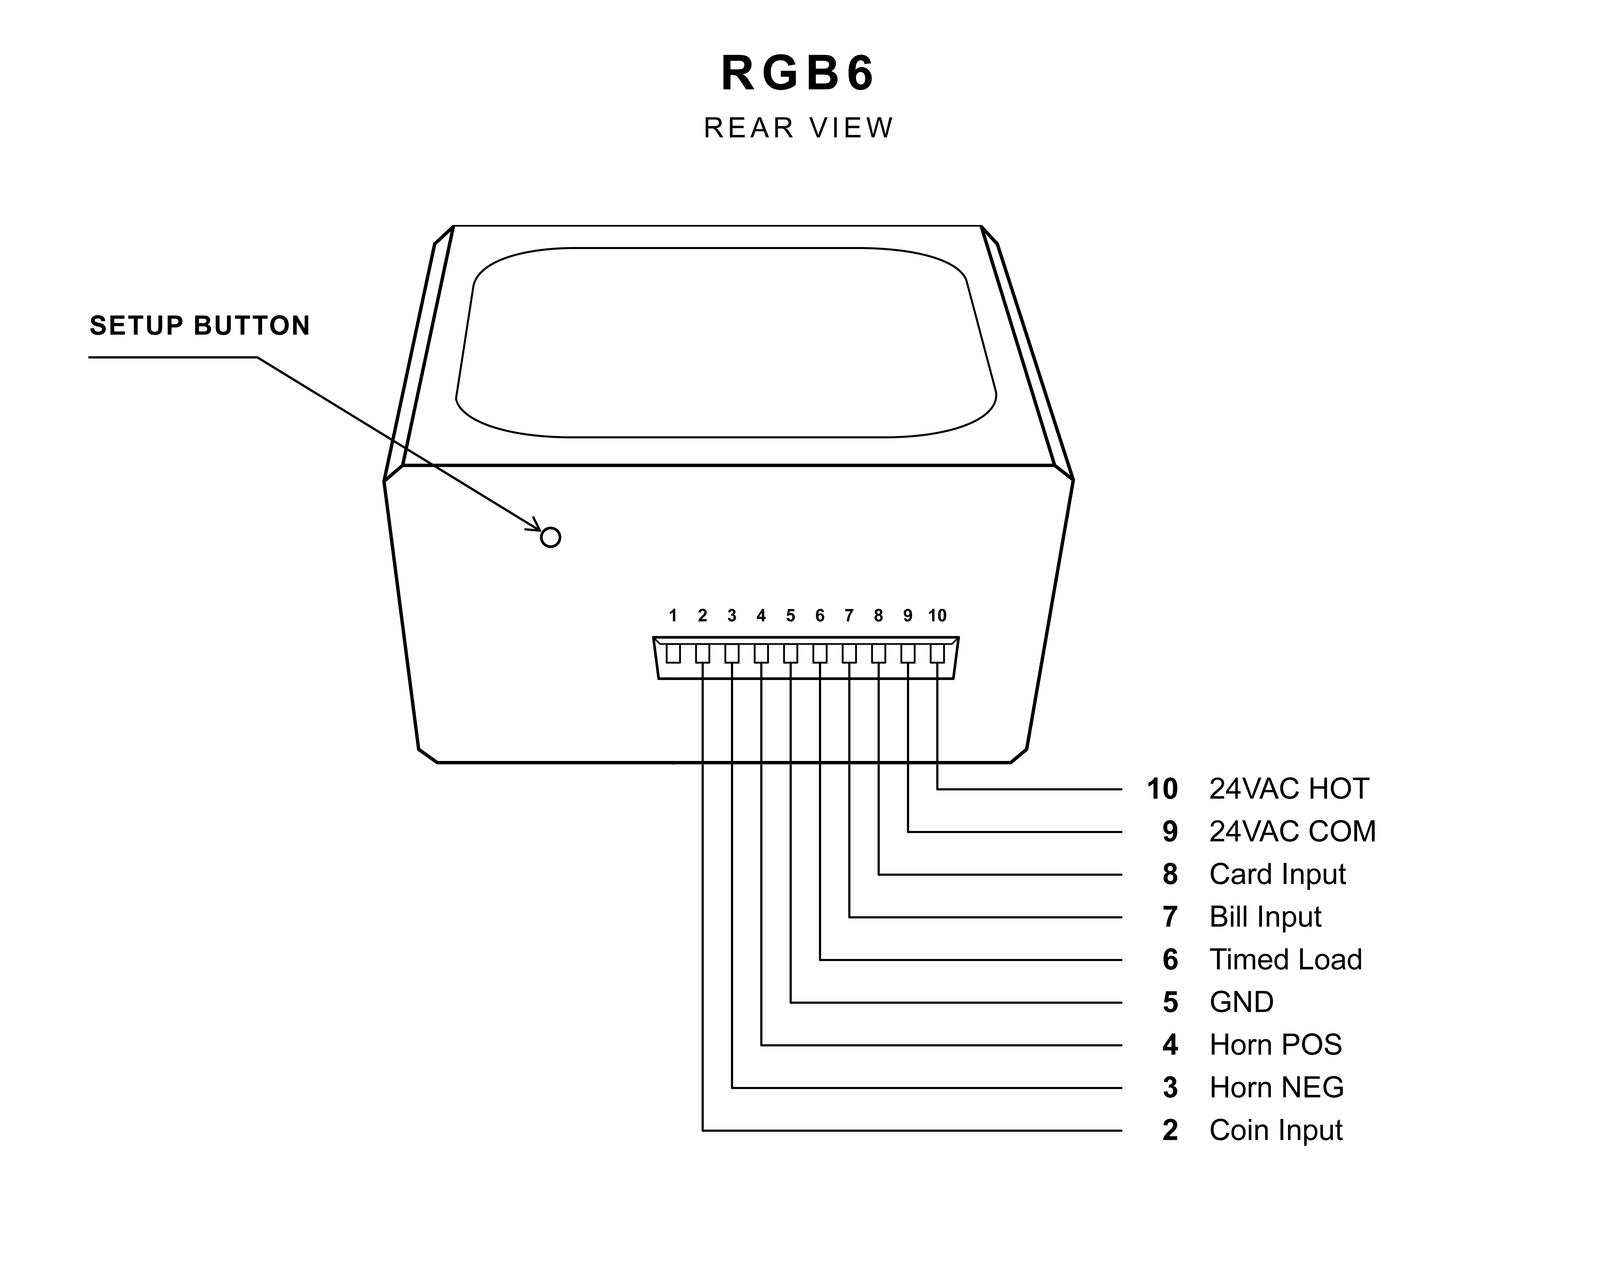
| Pin | Function | Pin | Function |
|---|---|---|---|
| 1 | Not used | 6 | Timed load |
| 2 | Coin input | 7 | Bill input |
| 3 | Horn − | 8 | Card input |
| 4 | Horn + | 9 | 24 V AC COM |
| 5 | GND | 10 | 24 V AC HOT |
Set at the factory
If you gave us your Wi-Fi details when you ordered, we've already entered them on this timer and it will join your network on its own. You can edit settings from PogoWash.com once it's online and you've added the device to your account.
Open the setup page
- Wait at least 5 seconds after power-up, then press the setup button once through the hole on the back of the timer. Use a plastic stylus or similar non-conductive tool.
- A red dot in the bottom-right corner of the display means setup mode is on.
- On your phone or laptop, join the Wi-Fi network
POGO-Wash-XXXX. It has no password. - The setup page opens by itself. If it doesn't, browse to
http://192.168.4.1. - Set your prices, time per coin/bill and display messages, then save.
Other button actions: press 3 times within 5 seconds to clear a running coin/bill wash. Hold for 10 seconds to factory reset (erases all settings, including Wi-Fi); release sooner to cancel.
Setup mode turns off after about 10 minutes of inactivity. Press the button again to reopen it. Preview the setup page anytime at pogowash.com/setupPreview.
Connect to Wi-Fi (optional)
The timer works without internet. Connect it to use remote settings, remote activation and revenue reports. If Wi-Fi was set at the factory (see page 1), skip to step 4.
- On the setup page, open WiFi Settings and turn on Enable Wifi.
- Enter your network name and password, then save.
- While setup mode is on, two green dots in the bottom-left corner mean the timer is connected to Wi-Fi and to POGOWash.com.
Add the timer to your POGOWash.com account
- Sign in or create an account at www.pogowash.com.
- Go to Devices > Add Device and enter the serial number from page 1 or from the label on your timer.
- Once the timer is online, you can change its settings, start a wash remotely and view revenue from your dashboard.
For remote activation, set a Remote Activation Password on the timer's setup page and enter the same password in your account.
Test before opening the bay
Insert a real coin and bill. Confirm the time added is correct, the pump or valve turns on when the wash starts and off when time runs out, and the horn and card reader work if used.